
Wet Basement Repair
Basements are susceptible to water because they are located below grade where the foundation is surrounded by moistened soil from groundwater or rain. Then, it leaks through the place of least resistance, which is typically the seams where the floor and wall connect.

Basement Waterproofing
This installation was led by Foreman, Wyatt Sokolis, and the Rainy Day Production crew

Basement Leak Repair
We installed our system in the ground of the basement.

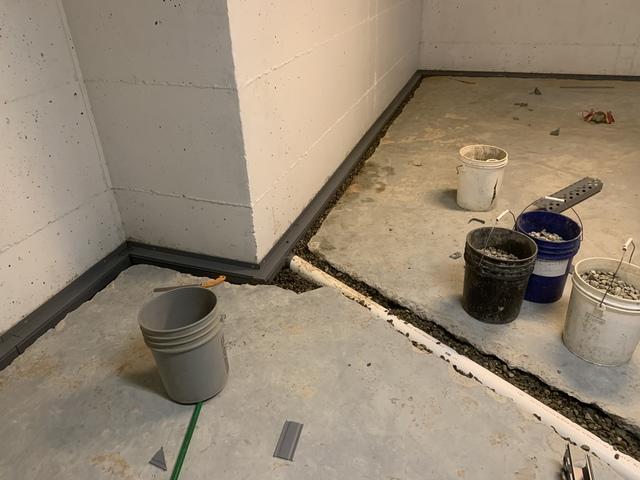
Interior Drainage
To install the interior basement drainage, WaterGuard, we created trenches by breaking up the concrete along the floor perimeter and through the middle for this particular basement.

Feed Line
This feed line helps move water to where it can be pumped.

Sump Pump in Basement
We install the TripleSafe Sump Pump at the lowest spot to capture leaks and pump them out. A flood test is performed to ensure everything works as it should.

WaterGuard
We installed a hybrid system with WaterGuard & WaterGuard I.O.S.

WaterGuard
WaterGuard is different because it has perforations and a special flange at the base of the wall to more easily collect water compared to normal drainage piping.

WaterGuard
WaterGuard is a patented, award-winning, no-clog design.
Drainage
We connected the lateral line to the WaterGuard channel.

Poured Concrete
Once installed, the channel gets covered with filter fabric, drain rock, and fresh concrete.

Drainage Installation
The system is leveled and nearly invisible when completely dry.

Discharge
Water get discharged out of the home through an exterior line. We protect the line from freezing and flooding with our IceGuard Ports picture here.

Steel Angle Brackets
We installed two steel angle brackets to support posts. We usually do this for posts either affected by water damage or going through the new drain path.

Dehumidifier
We installed our SaniDry XP Basement Dehumidifier which is ten times more powerful than traditional dehumidifiers and reduces the risk of mold.